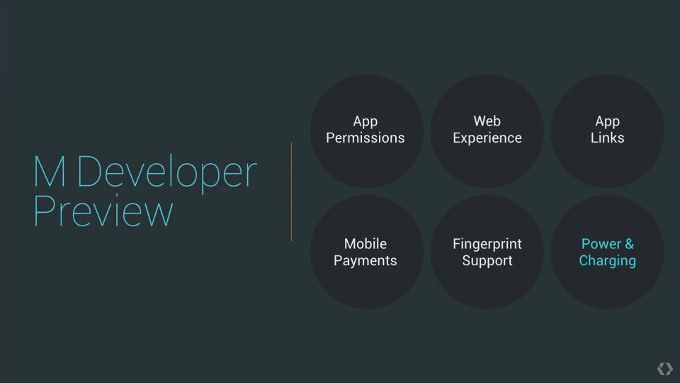
The Google I/O2015conference had already been concluded and we’re happy to impart the results with you. For this year, they had come up with astounding developments in the six significant areas of the little green bot: Application software permissions, application links, web experience, mobile payment (Android Pay), fingerprint support and charging&power.
Starting off with the star of the conference—the Android M. They say that at some point of a person’s life, he or she goes back to the basics. Android M embodies Google’s turning back to the basics. In contrast with Google Lollipop which signifies a lot of revolutionary and aesthetic design, Android M brings forth the stability and usability factors that developers surely need. Enters the six areas where the green bot with M moniker works on.

- Application Software Permissions
- Notice the permission “requests” you have to agree upon whenever you download apps from Google Play Store? As much as you love the app, sometimes it’s bothering that you just agreed on the developers to access your pictures, contacts, files…etc. With Android M, you already have something to say on it. You can customize which areas you want to be accessed and say ‘no’ for the hands off ones.
- Application Links
- Okay, you have the link with you but the instant access of having Google intelligently choose the app to open it with had been an irksome detail. Too much democracy in letting you select the app of your choice. Android M solves that by having a heightened awareness in choosing smartly the app where you can open the link. Example, the link you need to open pertains to Facebook. Instead of asking you if you want to open it to your browser while you have the Facebook app, Android M will automatically open the link to your Facebook app.
- Web Experience
- Chrome Custom Tabs is a new feature that allows applications to open a modified Chrome window on top of the active app software instead of having launch Chrome browser app separately. There’s no need to switch apps and you have a much easier UI to enjoy.
- Mobile Payment Support
- Ah, one of the most exciting part so far—easy payment and banking transactions with your little green bot. Android Pay is one feature you shouldn’t miss.
- Fingerprint Support System
- One of the standards on phones run by Android M is fingerprint support. After all, it comes really handy with Android Pay.
- Charging & Power
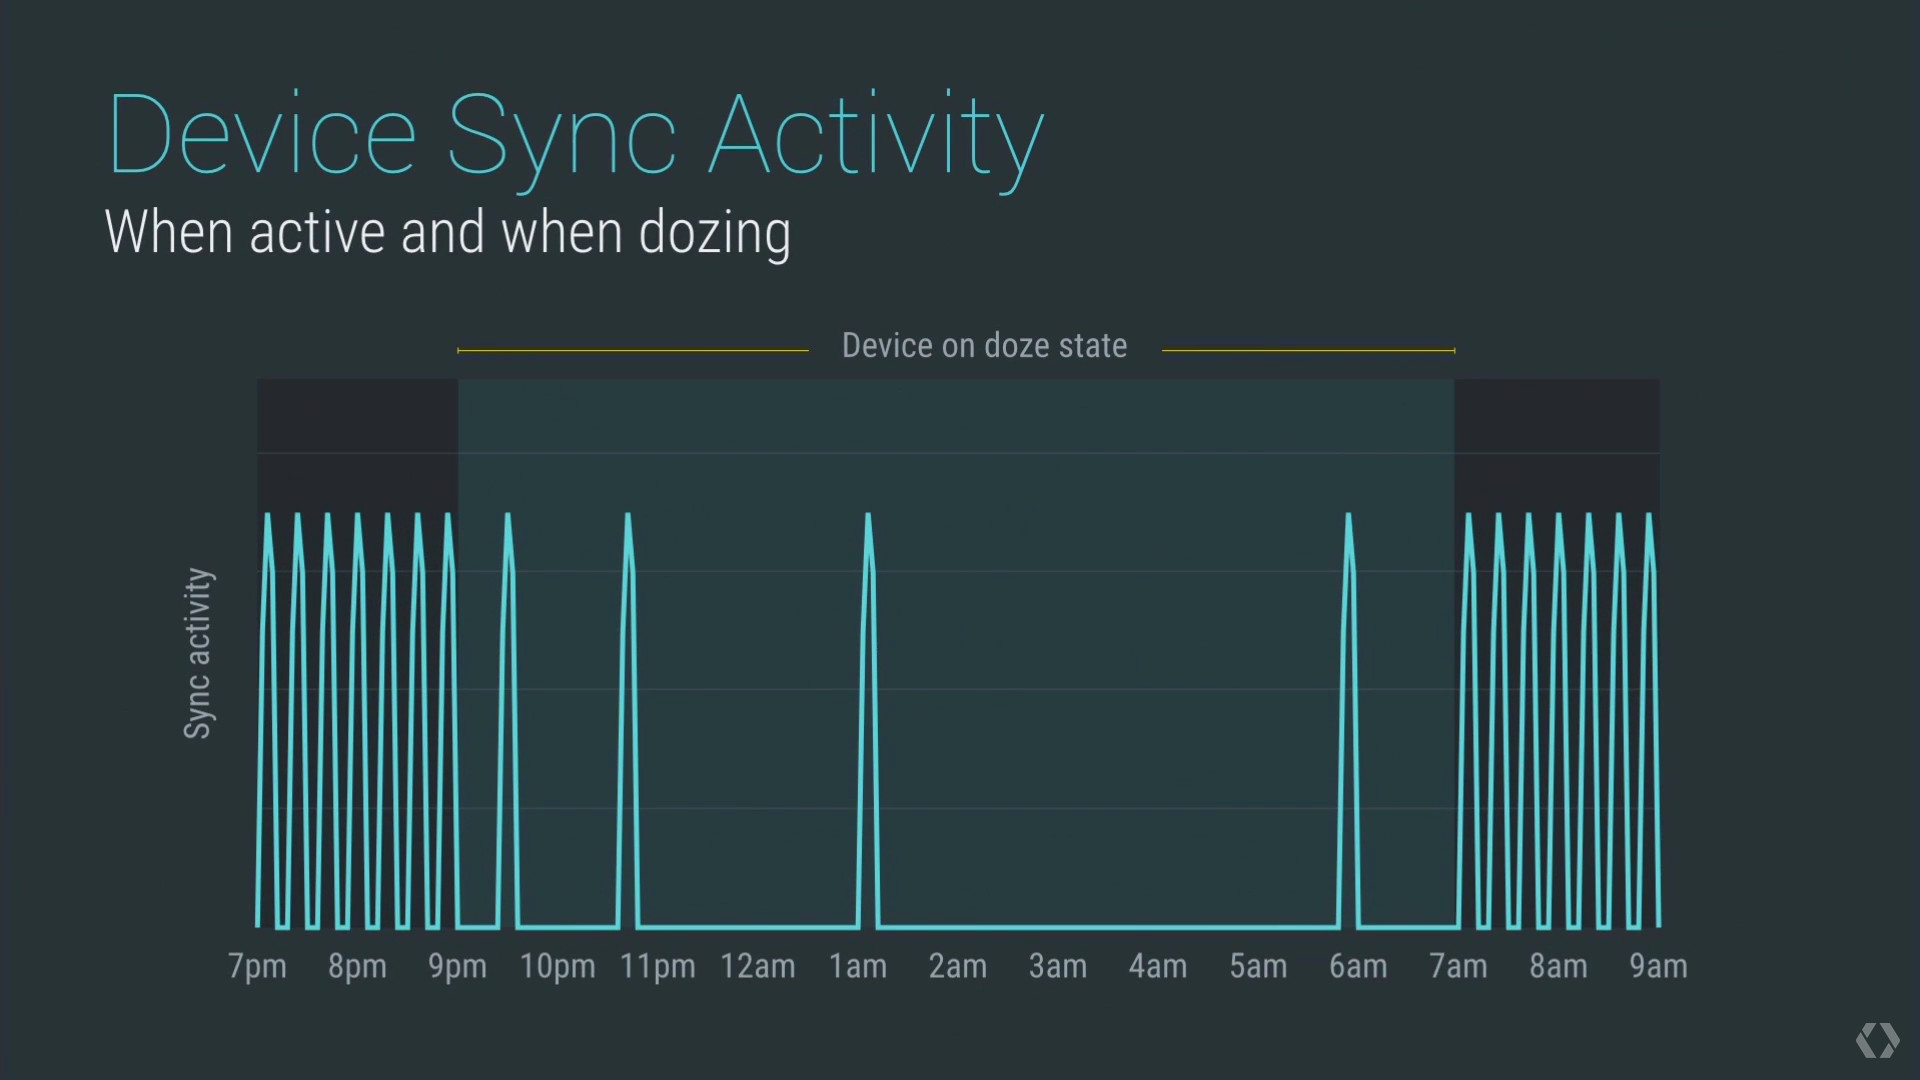
- In Android M, Google has incorporated two power and charging support systems: Doze and the new USB Type C connector.
With Doze feature, you can save more power as it is nearly equated to 2x of standby battery life. This comes handy to your favorite tablets that aren’t much needed. The cue here is that Android M lets the apps sleep deeply, making them harder to wake up.
Meanwhile the upcoming standard USB Type C is making its way with the transition of Android, signalling the cue of change when it comes to USB connectivity.
One major perk of having an Android M is its ability to allow users to move application data and APK’s into microSD cards. Yes, you don’t have to root your Android just to have this option. Android M supports this function and is called as Adoptable Storage Devices. The thing here is the microSD card will be encrypted by the phone, formatting it to behave like an internal storage. It is also applicable in the likes of USB sticks to support upcoming Android TVs and game consoles.
Meanwhile, if you have Nexus 5, 6, 9 or Nexus Player, you can install Android M firmware right away. Just follow the steps below and enjoy Android M.

Directions
- Download the compatible Android M Developer Preview for your device.
Nexus 5 │ Nexus 6 │ Nexus 9 │Nexus Player
- Unzip the folder of your downloaded Android M image and remember the file paths.
- You might need the help of Android SDK for faster experience but that’s up to you.
- Turn on the Developers option on your device by simply going to the Settings
- Tap on the Developers option, look for the USB debugging toggle and turn it on.
- Connect your Android device to a laptop or desktop computer through USB cable.
- Open Run through the Windows button or simply press Ctrl + R. Enter cmd and click on the OK button (or simply hit Enter).
- Remember you file path? Trace the path leading to the folder where you downloaded the Android M image. (Example: Enter cd C:\your\Android-M-image-folder-path)
- Next, input (or type) adb reboot boatloader but this will only have an effect for devices with unlocked bootloader.
- Then type flash-all for the code to do its thing.
- If it is successful, your Nexus device should reboot to open into the new Android M.