These days, Java programming has become one of the most preferred modules to be learned but before learning Java programming, the learners need to install Java in their computer system. It is quite easy to install Java yet some people always find it confusing because of the technical guidelines that need to be followed, especially when it comes to installing Java directory through Environment Variables. Here is a guide that will make it easy for you to install Java conveniently.
Step 1:
Before installing Java, you need to download and install JDK application which can be downloaded for free from any website. After the download is complete, install it by clicking the downloaded file. It will take you to the installation setup wizard. While installing the software, keep all the options as default ad keep clicking NEXT. This will install the JDK software on your system. Consequently, a new window will pop up asking you to install JRE. Again, click on the NEXT button and then click FINISH. To confirm whether Java was installed correctly on your system, go to that location where Java got installed, for an instance, C:\program files\Java and here, you would see the folders of Java named JDK1.7.0_01 and JRE7.
Step 2:
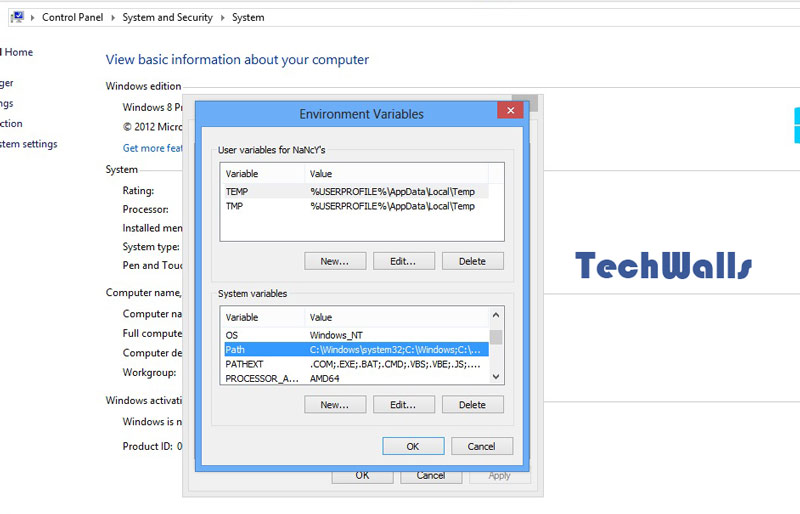
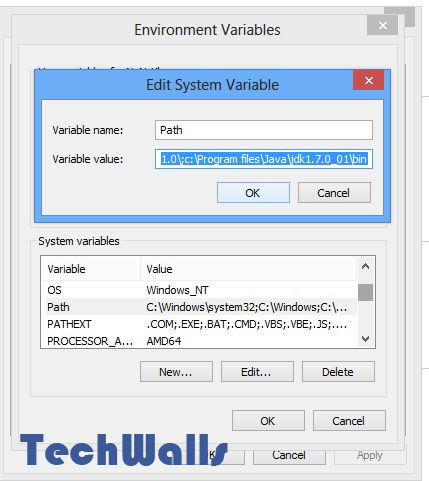
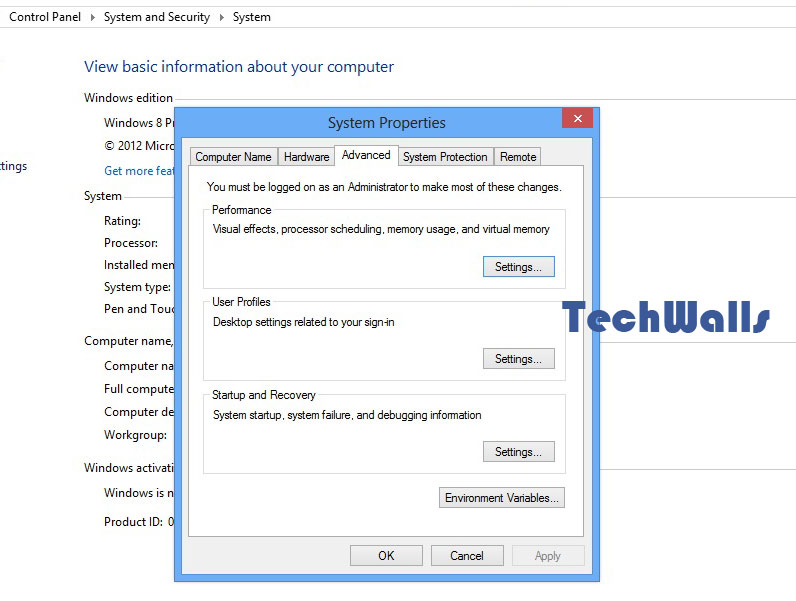
After this entire installation process of Java, you now need to set up the JDK home directory in Environment Variables. For this, go to Windows-> Start-> Computer. You can even directly go to the computer icon and click for properties. Next, you need to go to the control panel and click on the Advanced System Settings and then further click on the Environment Variables. In the box of Environment Variables, select path under System Variables, click it, and then click the edit button. While you are editing the path, go to the end of the string and put a semicolon at the end. Now copy the entire path of your JDK home directory and paste it and then click OK and then FINISH.
Step 3:
To test Java as home directory, go to Windows-> Start-> Run. Open command prompt and then click ok. In the command prompt, type Java and then press Enter. You will see that Java is installed on your system.