Most of us are not familiar how to timestamp photos in social media platforms. In Facebook, we can see most of our friends captioning their late uploaded photos with “Late Uploads,” put a dash then continue with the date the photos were actually taken. Good thing that Google Photos offer the timestamp feature.

Google Photos offers two ways in how to do your time- stamping: before the upload or after the upload of your photos. With the first option, you can modify the time and date of the bunch of photos in one time. On the other hand, the latter option allows you to modify the time and date as per photo. You can always choose between these two options depending on your need.
Directions
Using Windows Photos Gallery or Apple Photos in Mac OS X
- On Windows, open the Photo Gallery and select one or more photos by holding the CTRL (control) key.
- Click the date in the Info panel and select the right date from the calendar.
Or
- On Mac OS X, go to Apple Photos and select one or more pictures (and/or videos) from the gallery.
- Choose Adjust Date and Time from the Image menu and you’re right on tract.
When You Have Your Photos Uploaded already on Google Photos
(Note that this is possible but is a tiresome task since you can only edit one photo at a time. Additionally, you cannot do this inside the apps of your Android or iPhone devices just yet. You can only do the editing via Google Photos website.)
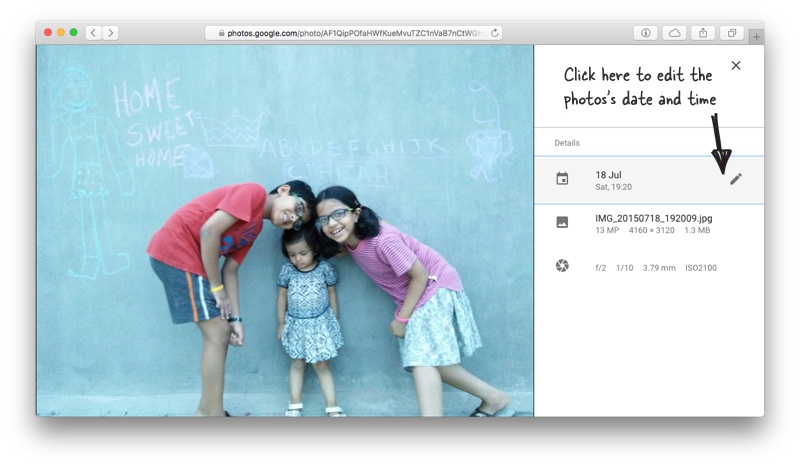
- Head to photos.google.com and click on any of your pictures.
- Click the “i” icon to open the Info page and click the pencil icon located right next to the date.
- You can then modify the time and date of that particular picture.
- Alternatively, if you want a less tedious task, you can download all of your photos on your desktop computer.
- Next, delete these pictures from Google Photos and empty the bin.
- Edit the dates of pictures on your desktop and re-upload them to your Google photos account. Finish!