Mac users often use their iTunes for music or media streaming purposes. If you’re an avid music listener, you can truly understand what we’re trying to say here. You can load and save as many music or media files as you want in your iTunes library. As long as you have the space, there is no trouble into it.

However, as time gets by and as your library gets bloated with your favorite media files, you may find your start up drive a little crowded. Freeing up space will immediately come to your mind. What is much better than to start with moving your iTunes library to another drive?
If you have iTunes version 7 and later, you might find this endeavour possible. Note that there will be varying locations or folder labels you can encounter with each iTune version. Yet these discrepancies are minimal at most. We’re using the iTunes 10x for this tutorial, but we hope you can trace your steps just in case you’re using other versions:

Directions
- Know that as you move your iTunes library location, the media files will also be eliminated from the original source. Hence, the need to back up your Mac or iTunes first is a must.
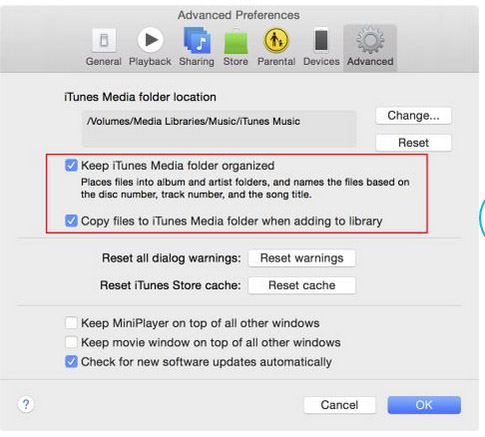
You may also want to be a little more organized with your files so you can do that before the backup process. You can do that by opening iTunes>>iTunes menu>>iTunes, Preferences>>Advanced. Tick on the box next to Keep iTunes Media folder organized (or Keep iTunes Music folder organized for other versions). Finally, click on the OK button and let iTunes organize the media or music folder for you.
- Create the location where you will transfer your iTunes library.
- You can do this by launching iTunes >>iTunes menu>>iTunes, Preferences>>Advanced.
- Look for the iTunes Media folder location and click on the Change button.
- In the Finder window, navigate to the location where you want to put the iTunes Media folder then click on the New Folder button.
- Make a name for the folder and click on the Create button.
- Next, click on the Open button to enter within.
- Locate Advanced Preferences window and then click on OK.
- A confirmation message will ask you if you want to move and rename the iTunes Media folder in order to match the Keep iTunes Media folder organized preference so just click on the OK button.
- Open iTunes and chooseFile, Library, Organize Library.
- In the Organize Library window, tick on the box next to Consolidate Library and confirm by clicking on OK. iTunes will then commence the transfer and all you have to do is to wait patiently.
- Open the Finder window and look for the new iTunes Media folder. Check on the folders if the files are completely transferred and if the location is correct.
- Open iTunes and select the Music entry located in the Library sidebar. Check if all your music files are there as well as your playlists, movies, TV shows and other media files are intact.
- Launch iTune Preferences and choose the Advanced
- To make sure everything is okay, you can play a movie or a song in iTunes. Congratulations!