
PDF documents which bear highly confidential information are often secured with passwords. While there are several ways to unlock them, you may find yourself spending dollars for the software. Good thing that Google Chrome comes handy when it comes to this. It is one sure way to unlock protected PDF files and is also friendly to both Mac and Windows users.
We are also going to share with you another password- removing feature that comes exclusively for Windows users. You might just be surprised that the feature has been always right there and ready to be acquired. Let’s begin our tutorial for removing passwords in protected PDF files.
Using Google Chrome
- Drag the PDF file or document that has password protection into the Google Chrome browser you have in your computer.
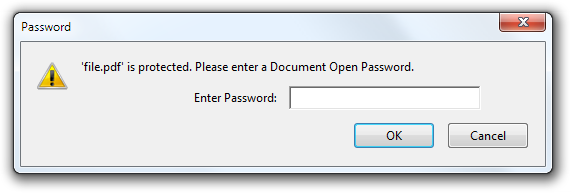
- Having dragged the file, the Chrome will ask you to enter the password of the file. Just enter the password and press enter.
- Proceed to the File menu of Google Chrome and select Print. You can also do the shortcut of Ctrl+ P for Windows; and Cmd + P for Mac version. Select the destination printer as “Save as PDF” and hit the Save button.
Google Chrome will then save the PDF on your desktop but this time, the file is no longer password protected. Opening this in Chrome, the browser will no longer prompt you to provide the password.
Using BeCyPDFMetaEdit
- Let’s say you’re not a big fan of Google Chrome but a Windows user, nevertheless. You can still remove the password by downloading BeCyPDFMetaEdit, a Windows utility, that can remove passwords from PDF files.
- Launch the program and you are soon asked for the location of the wanted PDF file.
- Before you select and open the PDF file, change mode into ‘Complete Rewrite.’ Switch to the Security tab and put the ‘Security System’ into ‘No Encryption’ setting. Click the Save button and—voila!—your file won’t no longer need a password just to be opened.