Previously, we released an article on how to view certain region locked sites such as Netflix, Pandora, YouTube and Instagram if the country you’re at is not allowing you to access them via your Android smartphone. This time, we are teaching you how to access area-locked apps on your Android using a proxy server.

Is having a proxy server ‘that’ important for most of us? While not all people need the proxy server, some deemed this option as a must. If you’re a student and would want to access your school’s network so you can browse your Facebook, YouTube and other restricted sites proxy server comes at hand. But then again, not all proxy servers can be used as schools may have already anticipated that. From here comes the trickiest part—searching for the right proxy server application. With a bit of Google-ing and searching, you may find the right one. So for the basic directions on creating proxy servers we give you the following:
Directions
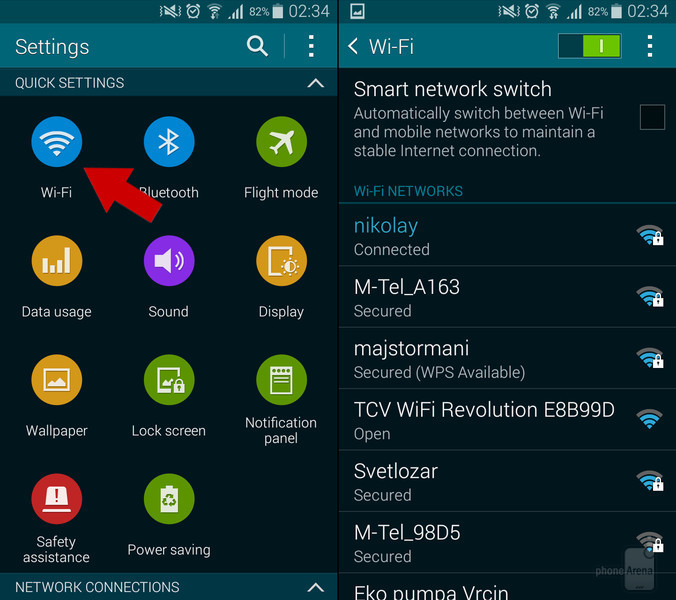
- On your Android device (tablet or smartphone), access the proxy server via WiFi menu.
- Long press the WiFi network you are using (let’s say, your school’s WiFi) and you’ll see a pop up menu. You will see the option “Modify network config” and tap on that. Another pop up menu will appear that will show “Show advanced options.”
- You can then access that particular Wi-Fi setting’s proxy server where you can fiddle through the “manual” option. Remember that the setting you will modify can only affect this particular WiFi network.
- For the finale, enter the setting for your chosen proxy server address and its port number which is usually 8080. Tap on the “Save” button and you’re done creating a proxy server.